Introduction:
Who doesn’t love the aroma of freshly baked biscuits wafting through the kitchen? In this article, we’re diving into the delightful world of baking with an easy buttermilk biscuit recipe that promises to elevate your culinary skills. Get ready to experience the joy of making these delectable treats from scratch – no fancy ingredients or complicated steps required!

The Magic of Buttermilk Biscuits There’s something magical about the simplicity of buttermilk biscuits. The secret lies in the perfect balance of ingredients, and you’ll be surprised at how effortlessly you can recreate this classic comfort food in your own kitchen.
Gather Your Ingredients Before we embark on our biscuit-making adventure, let’s gather the essentials. You’ll need:
All-purpose flour

Baking powder
Baking soda
Salt

Unsalted butter
Cold buttermilk
Preparing the Dough Now, let’s roll up our sleeves and dive into the heart of the process – preparing the biscuit dough. In a large mixing bowl, combine the flour, baking powder, baking soda, and a pinch of salt. Cut in the cold, cubed butter until the mixture resembles coarse crumbs.
The Buttermilk Magic Pour in the cold buttermilk and gently mix until the dough comes together. The acidity of the buttermilk reacts with the baking powder, creating that coveted light and flaky texture. It’s like a chemistry experiment, but much tastier!
Shaping and Cutting Turn the dough out onto a floured surface and gently knead it a few times. Roll it out to about half an inch thickness and, using a biscuit cutter, stamp out those perfect rounds. Place them on a baking sheet, close but not touching, for that golden exterior.
Baking Time – The Sweet Wait Pop those beauties into a preheated oven, and here comes the hardest part – waiting. In about 12-15 minutes, your kitchen will be filled with the irresistible scent of freshly baked biscuits. Keep an eye on them; you want that golden brown perfection.
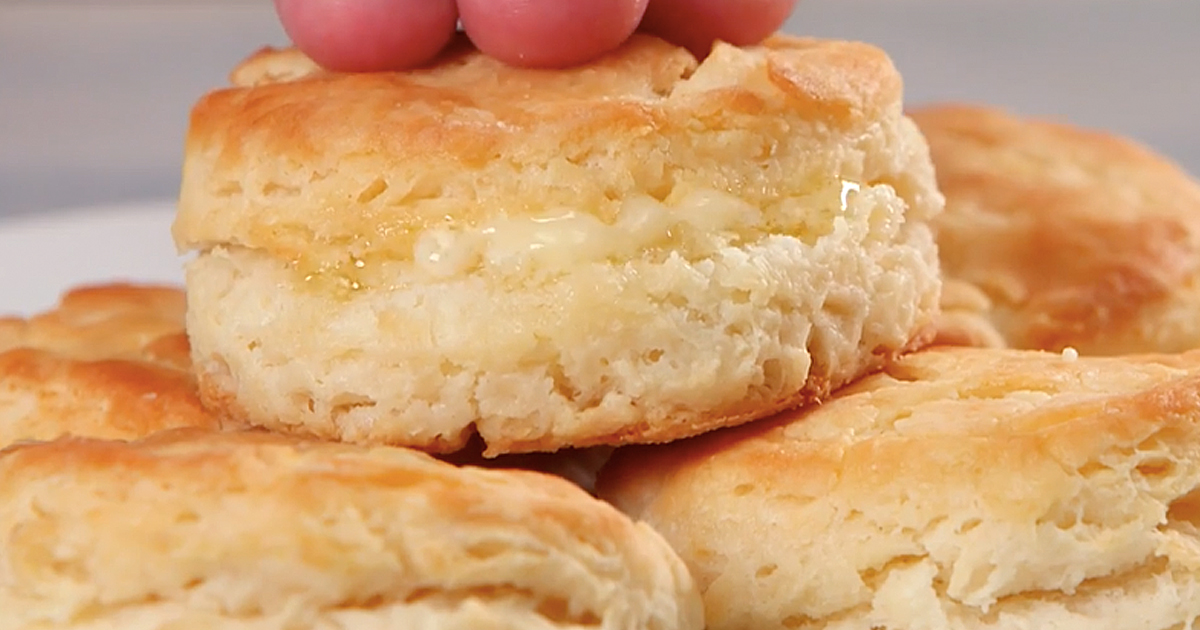
The Reward – A Buttery, Flaky Bite Finally, the moment of truth arrives. As you pull those biscuits from the oven, a sense of accomplishment washes over you. Break one open – the steam escaping, the buttery aroma – and take a bite. You’ve just created a masterpiece, and the reward is a taste of pure bliss.
Conclusion: Baking these easy buttermilk biscuits is a journey filled with joy and satisfaction. From the simplicity of the ingredients to the magic that happens in the oven, each step is a testament to the artistry of homemade baking. So, the next time you crave a warm, flaky biscuit, skip the store-bought versions and embark on this delightful culinary adventure.
FAQs:
- Can I use salted butter in the recipe? It’s recommended to use unsalted butter to have better control over the salt content in your biscuits.
- Can I substitute buttermilk with regular milk? While buttermilk adds a unique flavor and acidity, you can make a substitute by adding 1 tablespoon of white vinegar or lemon juice to 1 cup of milk.
- How do I store leftover biscuits? Store them in an airtight container at room temperature for up to two days or in the refrigerator for a longer shelf life. Reheat in the oven for that fresh-out-of-the-oven feel.
- Can I freeze the biscuit dough for later use? Yes, you can freeze the biscuit dough. Shape it into rounds, freeze on a baking sheet, and then transfer to a sealed bag. When ready to bake, place them directly in the oven – no need to thaw.
- What’s the secret to achieving a flaky texture? Cold ingredients are key. Ensure your butter and buttermilk are cold, and don’t overmix the dough. This preserves the pockets of butter that create the flakiness during baking.