Introduction:
Indulging in a perfectly baked red velvet cupcake is like experiencing a sweet symphony of flavors and textures. If you’re a fan of this classic treat, you’re in for a treat today! In this article, we’ll explore a foolproof red velvet cupcake recipe that promises to elevate your baking game and leave your taste buds dancing in delight.

The Allure of Red Velvet Cupcakes
Red velvet cupcakes hold a special place in the hearts of dessert enthusiasts. Their vibrant crimson hue, coupled with a velvety texture, makes them a standout choice for any occasion. But what exactly gives these cupcakes their distinctive color and flavor?
Unveiling the Secret Ingredient

At the heart of every great red velvet cupcake is the humble but magical ingredient – cocoa powder. Contrary to popular belief, it’s not the food coloring that imparts the rich red color, but rather a balanced combination of cocoa powder and acidic ingredients. This blend creates a harmonious taste that’s not too sweet, not too tangy, but just right.
Gathering Your Ingredients
Before embarking on your baking adventure, let’s ensure you have all the essentials. For our red velvet cupcakes, you’ll need flour, sugar, cocoa powder, baking soda, buttermilk, eggs, vanilla extract, vinegar, and of course, red food coloring. Having high-quality ingredients lays the foundation for a delectable end result.

The Art of Mixing and Measuring
Baking is as much about precision as it is about passion. Begin by sifting your dry ingredients together to eliminate lumps and create a smooth batter. In a separate bowl, whisk the wet ingredients until they achieve a homogeneous blend. The key is to gradually incorporate the dry mixture into the wet, ensuring a lump-free and velvety consistency.
Achieving the Perfect Red Hue
While some may be tempted to go heavy-handed with the food coloring, moderation is key. Start with a few drops and gradually add more until you achieve the desired shade of red. Remember, it’s always easier to add more color than to take it away.
Baking to Perfection
Preheat your oven to the recommended temperature and prepare your cupcake liners. Fill each liner about two-thirds full to allow room for the cupcakes to rise. Be vigilant with the baking time – overbaking can result in dry cupcakes. A toothpick inserted into the center should come out with a few moist crumbs, indicating they’re ready to be devoured.
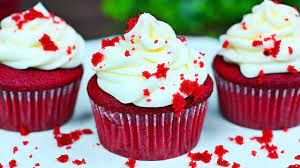
Cream Cheese Frosting – The Icing on the Cake
No red velvet cupcake is complete without a generous dollop of cream cheese frosting. Whipping together cream cheese, butter, powdered sugar, and vanilla extract creates a luscious topping that perfectly complements the subtle cocoa undertones of the cupcakes. Feel free to get creative with piping techniques for a visually appealing finish.
Serving Suggestions and Variations
Whether you’re hosting a celebration or simply satisfying a sweet tooth, red velvet cupcakes are a crowd-pleaser. Consider garnishing with chocolate shavings, sprinkles, or even edible flowers for an extra touch of elegance. Experimenting with mini-cupcakes or adding a surprise filling can also add an element of excitement to this classic recipe.
Conclusion – Baking Bliss in Every Bite
In conclusion, mastering the art of red velvet cupcakes involves a delicate balance of ingredients, precision in mixing, and a touch of creativity in presentation. By following this comprehensive guide, you’re well on your way to creating a batch of cupcakes that not only look stunning but also taste like a heavenly indulgence.
FAQs:
Q1: Can I use natural food coloring instead of artificial red food coloring? Certainly! Natural alternatives like beetroot juice or pomegranate juice can be used to achieve a red hue without relying on artificial coloring.
Q2: Can I substitute buttermilk with regular milk? While buttermilk adds a unique tanginess to the cupcakes, you can make a DIY version by adding a tablespoon of vinegar or lemon juice to regular milk.
Q3: How do I store leftover cupcakes? Store cupcakes in an airtight container in the refrigerator for up to three days. Be sure to bring them to room temperature before serving.
Q4: Can I freeze red velvet cupcakes? Absolutely! Freeze unfrosted cupcakes in a sealed container for up to three months. Thaw in the refrigerator and add frosting before serving.
Q5: Can I make these cupcakes gluten-free? Yes, you can use a gluten-free flour blend as a substitute for regular flour. Ensure all other ingredients are gluten-free as well for a delicious gluten-free version.