Introduction:
Welcome to the world of delightful indulgence, where the rich aroma of chocolate wafts through the air, and the anticipation of a homemade treat brings a smile to your face. In this article, we’re diving into the art of creating the perfect Homemade Chocolate Cake Pops – a delightful fusion of moist cake and velvety chocolate coating. Get ready to embark on a culinary adventure that is not only easy but also a guaranteed crowd-pleaser!

Unwrapping the Basics – Ingredients and Tools Let’s start with the essentials. To create these heavenly cake pops, gather the following ingredients:
- 1 box of your favorite chocolate cake mix
- 1 cup of chocolate frosting
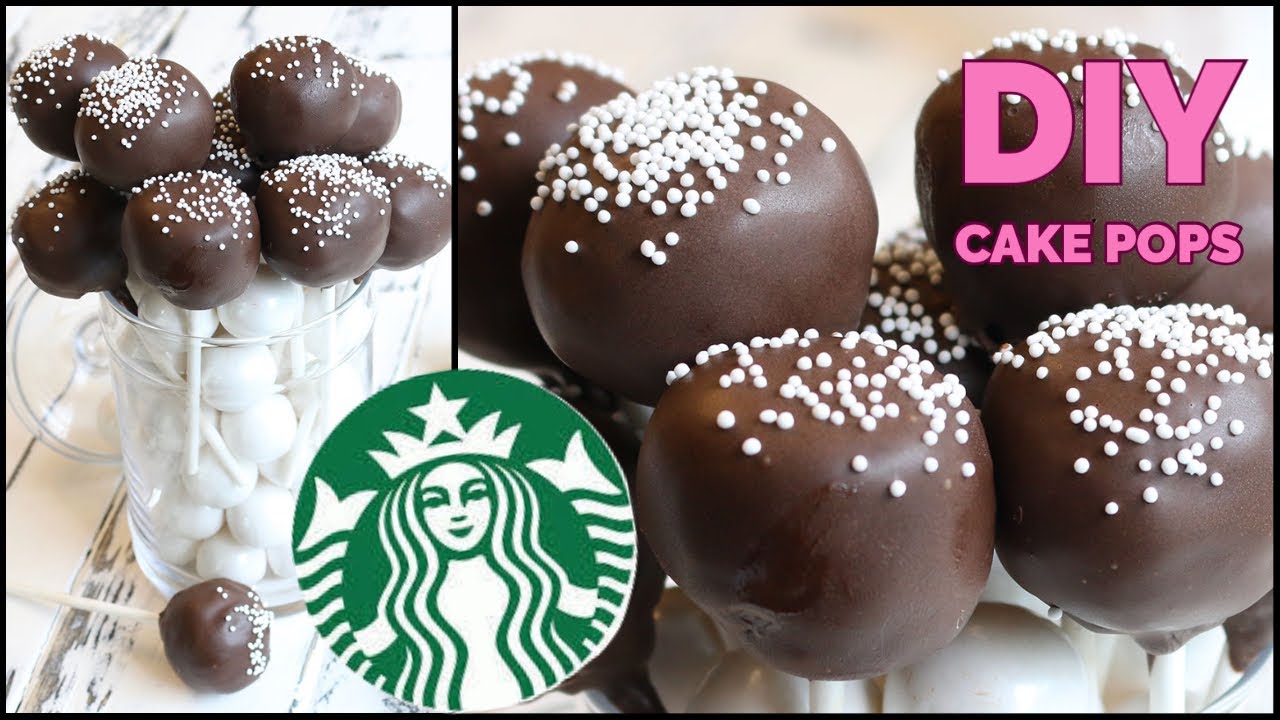
- 1 package of high-quality chocolate for melting
- Lollipop sticks
- Sprinkles or toppings of your choice
Baking the Perfect Cake Base Begin by following the instructions on the cake mix box. Feel free to add a personal touch – perhaps a dash of vanilla extract or a handful of chocolate chips for that extra oomph. Once baked, let the cake cool completely before moving on to the next step.
Crumbling and Binding – Creating the Cake Pop Mixture Time to get your hands dirty (literally)! Crumble the cooled cake into a large bowl until it resembles fine crumbs. Add the chocolate frosting gradually, mixing until the mixture achieves a dough-like consistency. This step is the secret to the moist, fudgy center of your cake pops.

Crafting Your Cake Pops – Shaping and Inserting Sticks Dive into the fun part – shaping your cake pop mixture into bite-sized spheres. Roll them gently between your palms, ensuring a uniform shape. Insert lollipop sticks into each pop, making sure they are secure. Place the pops on a tray and chill in the fridge for at least 30 minutes, allowing them to firm up.
Melting Magic – Preparing the Chocolate Coating While your cake pops chill, melt the high-quality chocolate in a microwave-safe bowl or on a stovetop using a double boiler. Stir continuously until smooth and glossy. This is where the magic happens – the luscious coating that elevates your cake pops to gourmet status.
Dip and Decorate – Bringing Your Cake Pops to Life Now comes the exciting part – dipping your chilled cake pops into the melted chocolate. Swirl each pop until fully coated, letting any excess chocolate drip off. Sprinkle with your favorite toppings or drizzle with contrasting chocolate for a visually appealing finish. Get creative and let your imagination run wild!

The Waiting Game – Patience Is a Virtue As tempting as it may be, resist the urge to devour your cake pops immediately. Place them back on the tray and allow the chocolate coating to set. This step ensures a perfect, glossy finish and prevents any mess during the devouring phase.
Serving Suggestions – Making it a Sensory Experience Now that your cake pops are ready, it’s time to enjoy them to the fullest. Serve them on a decorative platter or individually wrapped for gifting. Pair them with a cup of hot cocoa or your favorite beverage for a truly indulgent experience.
Storing Tips – Keeping the Bliss Intact In case you have leftovers (a rare occurrence), store your cake pops in an airtight container in the refrigerator. They can last for several days, but let’s be honest – they’re likely to disappear much sooner!
The Verdict – Taste-Tested and Approved The moment of truth has arrived. Take a bite into the decadent goodness of your homemade chocolate cake pop. The moist cake center, paired with the rich chocolate coating, is a match made in dessert heaven. Don’t be surprised if you find yourself reaching for seconds!
Conclusion: In the realm of homemade treats, few things compare to the joy of crafting and indulging in your own chocolate cake pops. With a bit of creativity and a dash of patience, you can turn a simple cake mix into a gourmet delight that will leave everyone craving more. So, roll up your sleeves, gather your ingredients, and embark on this delightful journey of homemade decadence!
FAQs:
Q1: Can I use a different type of cake mix for this recipe? Absolutely! Feel free to experiment with different flavors like vanilla, red velvet, or even a decadent chocolate fudge mix to customize your cake pops.
Q2: Can I substitute chocolate frosting with another type of frosting? While chocolate frosting complements the cake pops perfectly, you can get creative with flavors like cream cheese, caramel, or even a fruity option to suit your taste preferences.
Q3: How do I prevent the cake pops from falling off the sticks during dipping? Ensure your cake pops are well-chilled before dipping. If you’re still facing issues, dip the lollipop sticks into the melted chocolate before inserting them into the cake pops for extra stability.
Q4: Can I freeze cake pops for later consumption? Yes, you can freeze cake pops for up to a month. Make sure to wrap them individually in plastic wrap and store them in an airtight container before freezing.
Q5: What’s the best way to transport cake pops without ruining the coating? To transport cake pops without smudging the coating, place them in a tall cup or foam block, ensuring they are secure and upright. This prevents them from touching each other and maintains their visual appeal.