Hey there, pumpkin enthusiasts!
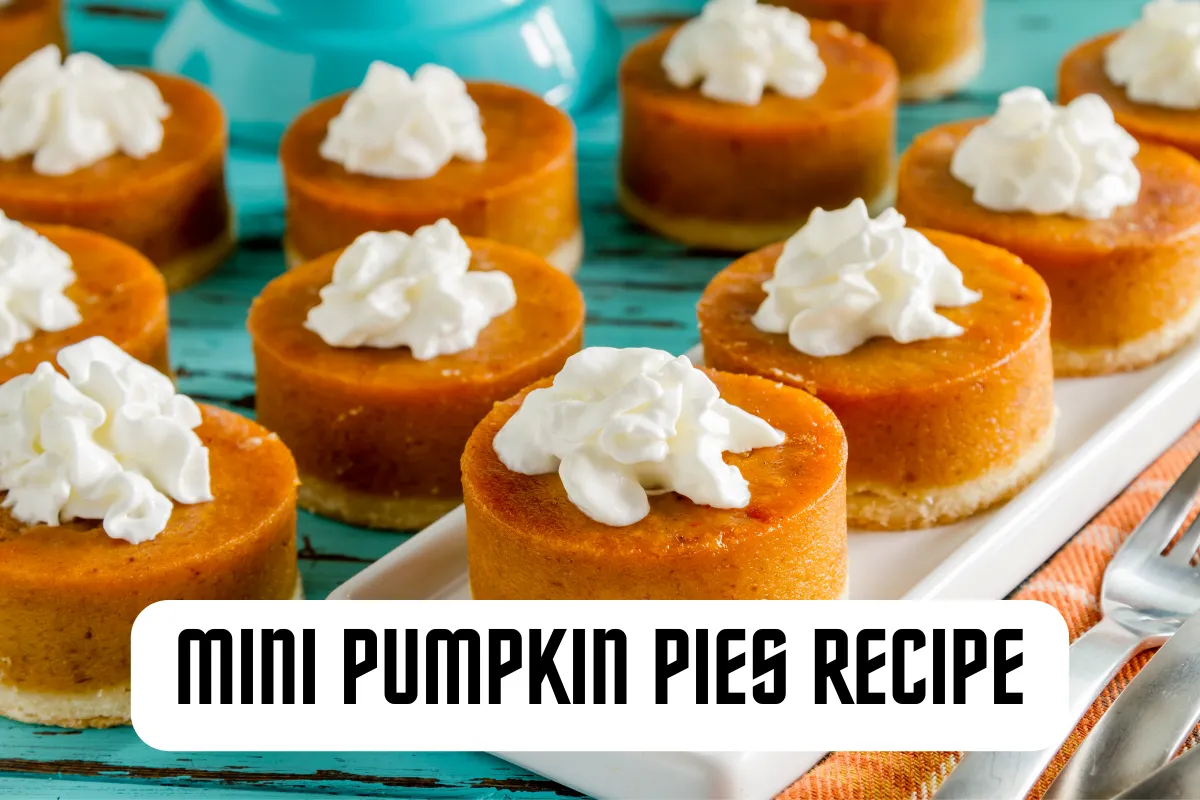
As the crisp breeze of autumn starts to sweep in, it’s time to cozy up with a delightful treat – Mini Pumpkin Pies.
These bite-sized wonders capture the essence of fall in every mouthful.
Join me on a culinary adventure as we explore a simple and scrumptious recipe that will have you savoring the flavors of the season in no time.
The Charm of Mini Pumpkin Pies
Discover the magic that happens when the iconic pumpkin pie meets a perfectly portioned, miniaturized version.
Ingredients for Mini Pumpkin Pies
A Grocery List for Fall Happiness
Let’s gather the goodies that will make our mini pumpkin pies a reality:
- For the Pie Crust:
- 1 and 1/2 cups all-purpose flour
- 1/2 cup unsalted butter, chilled and cubed
- 1/4 cup granulated sugar
- 1/4 teaspoon salt
- 3 to 4 tablespoons ice water
- For the Pumpkin Filling:
- 1 cup canned pumpkin puree
- 1/2 cup brown sugar, packed
- 1/2 teaspoon ground cinnamon
- 1/4 teaspoon ground ginger
- 1/4 teaspoon ground nutmeg
- 1/4 teaspoon salt
- 1/2 cup evaporated milk
- 1 large egg, beaten
Crafting Mini Pumpkin Pies
A Symphony of Autumnal Aromas
Follow along as we transform these basic ingredients into mini masterpieces that will steal the show:
Step 1 – Create the Pie Crust
Begin by preheating your oven to 375°F (190°C). In a food processor, pulse together the flour, sugar, and salt.
Add the chilled, cubed butter and pulse until the mixture resembles coarse crumbs.
Gradually add the ice water until the dough comes together. Shape it into a disk, wrap it in plastic, and chill for at least 30 minutes.
Step 2 – Roll and Cut
On a floured surface, roll out the chilled dough to about 1/8 inch thick.
Using a round cookie cutter or the rim of a glass, cut out circles slightly larger than the size of your mini muffin tin cups.
Step 3 – Line the Mini Muffin Tin
Gently press each dough circle into the cups of a mini muffin tin, forming mini pie crusts.
Don’t forget to give them a little pinch on the edges for that rustic charm.
Step 4 – Prepare the Pumpkin Filling
In a bowl, whisk together the pumpkin puree, brown sugar, cinnamon, ginger, nutmeg, salt, evaporated milk, and beaten egg until well combined.
The aroma alone will have you dreaming of autumn leaves and cozy evenings.
Step 5 – Fill ‘Em Up
Spoon the pumpkin filling into each mini pie crust, almost to the top.
These little guys may be small, but they pack a punch of flavor!
Step 6 – Bake to Perfection
Bake in the preheated oven for approximately 12-15 minutes or until the crust is golden brown, and the filling is set.
Your kitchen will be infused with the irresistible scent of fall.
Tips for Perfecting Mini Pumpkin Pies
Navigating the Mini Pie Paradise
Let’s ensure your mini pumpkin pies turn out as cute and delicious as possible with these handy tips:
Tip 1 – Keep It Chilled
Chill the pie crust dough thoroughly.
This helps in achieving a flaky, tender crust.
A little patience in the beginning pays off with each delightful bite.
Tip 2 – Spice It Up
Feel free to adjust the spice levels in the filling.
If you’re a cinnamon aficionado, go ahead and sprinkle a little extra magic.
Tip 3 – Get Creative with Crusts
Experiment with different crust options.
Consider using graham cracker crusts for a slightly sweeter twist or adding a pinch of cinnamon to the dough.
Serving and Decorating Mini Pumpkin Pies
Elevating Your Mini Pie Experience
These tiny delights deserve a grand presentation.
Let’s explore some serving and decorating ideas:
Whipped Cream Swirls
Top each mini pumpkin pie with a dollop of freshly whipped cream.
You can even get creative and make little swirls for that professional bakery look.
Sprinkle of Cinnamon
A light dusting of cinnamon on top not only adds a visual appeal but also enhances the warm, spiced flavors of the pumpkin filling.
Mini Pumpkin Garnish
For a playful touch, consider placing a tiny pumpkin-shaped cookie on top of each mini pie. It’s the little details that make a big impact.
Conclusion
There you have it – a journey into the heart of fall through the lens of Mini Pumpkin Pies.
These bite-sized wonders encapsulate the warmth, spices, and joy that this season brings.
Share them at gatherings, savor them with a cup of hot cocoa, or simply indulge in a moment of autumn bliss.
FAQs After The Conclusion
1. Can I use store-bought pie crusts for convenience?
Absolutely! While homemade crusts add a special touch, store-bought pie crusts work well for saving time.
Just ensure they are rolled thin for that perfect bite.
2. Can I make these ahead of time?
Certainly! Bake the mini pumpkin pies and store them in an airtight container in the refrigerator for up to 2 days.
Warm them slightly before serving for the best taste.
3. Can I freeze mini pumpkin pies?
Yes, you can freeze them after baking.
Place them in a single layer on a baking sheet until frozen, then transfer to a freezer bag.
Thaw and reheat when ready to enjoy.
4. What’s the best way to reheat mini pumpkin pies?
For that freshly baked feel, preheat your oven to 350°F (175°C) and warm the mini pies for about 5-7 minutes.
Alternatively, a quick zap in the microwave works too.
5. Can I substitute the evaporated milk?
Certainly! If you’re out of evaporated milk, whole milk or half-and-half can be used as a substitute without compromising the deliciousness.
Adjust the quantity as needed.